Remote Desktop 2012 services without the whole infrastructure
In most larger environments you usually want a complete installation with a connection broker, web interface and gateway service. But what about a small environment? Or you just need a stand-alone server from which to manage the rest of the network. Using a connection broker a web interface is overkill, and why install these roles without needing them.
When following all the howto’s on the internet, you’ll always end up with at least four roles installed on one or more servers (RDSH, RDWI, CB and RD licensing). With a session host collection configuration. The part I liked about the way 2008(R2) worked, one could use only RDSH and the licensing role to create a really simple configuration. This option appears to have been removed in 2012 and later. In some cases, such a simple setup can be quite useful, in this blog I’ll explain a way to do this.
The default path most take leads to opening the server manager, choosing add role to install and choosing Remote Desktop Role:
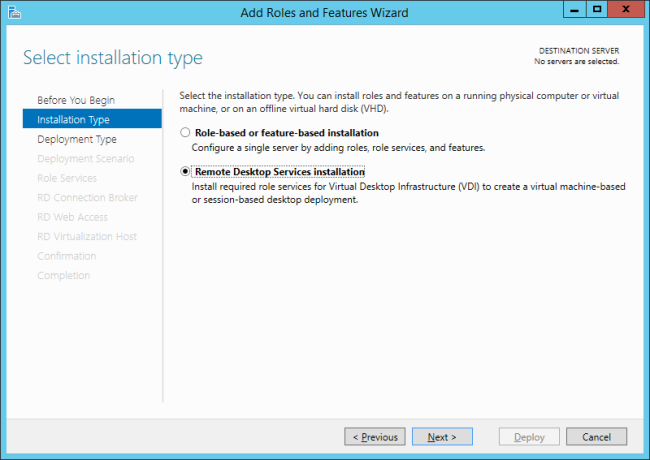
Next next to role list
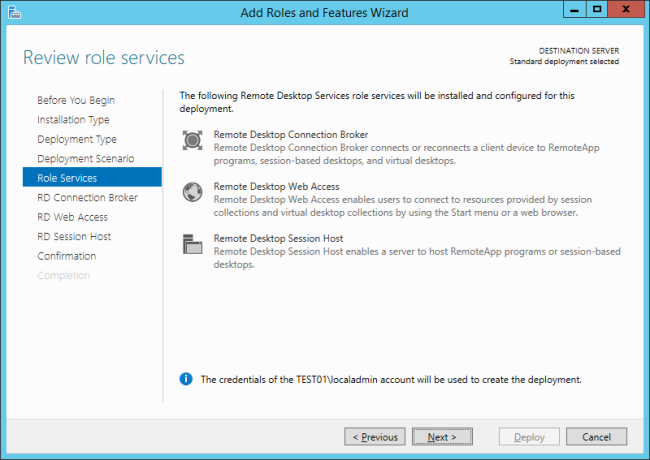
Uh oh, no next possible without assigning a connection broker.
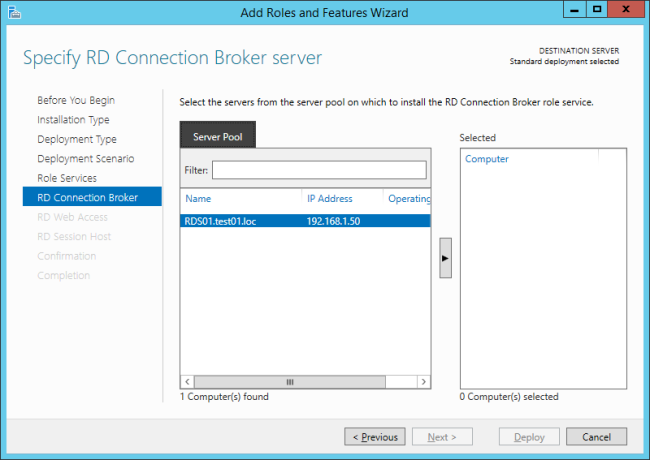
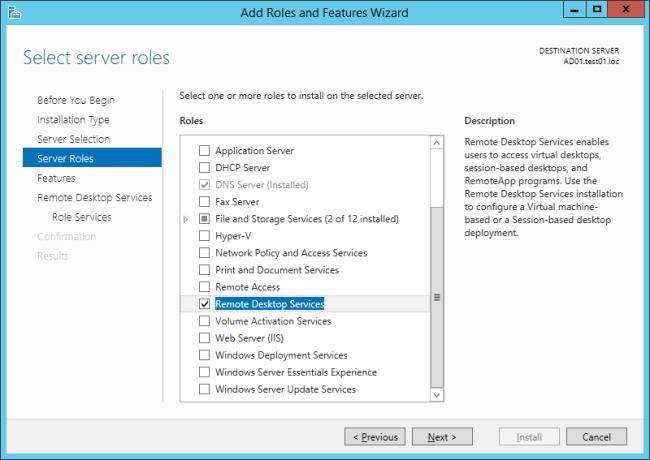
But it is possible to just install the RDSH role without doing from a connection broker, or using a connection broker. The trick is, don’t select remote desktop services during the adding of the role, but the regular role-based of feature-based installation:
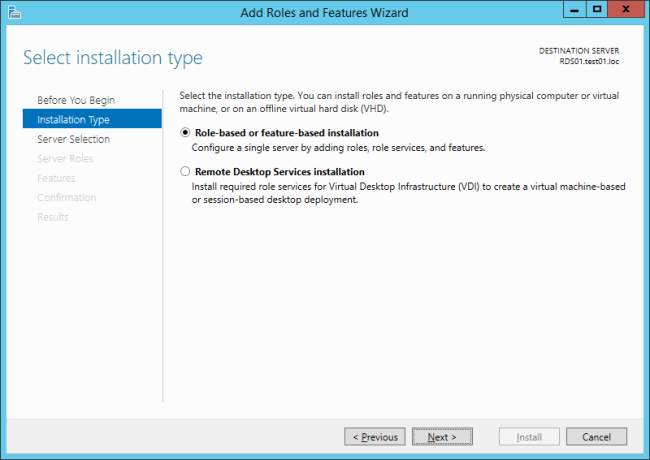
Next, and one can select Remote Desktop services:
Next until:
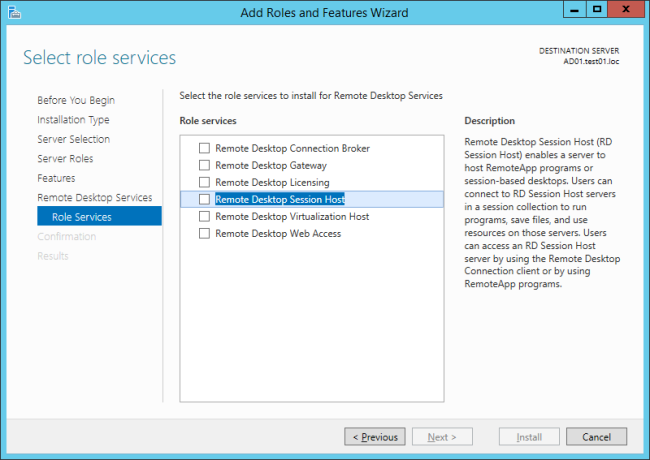
And here we can select the desired roles, in this case RDSH and licensing. It also offers to install the management features:
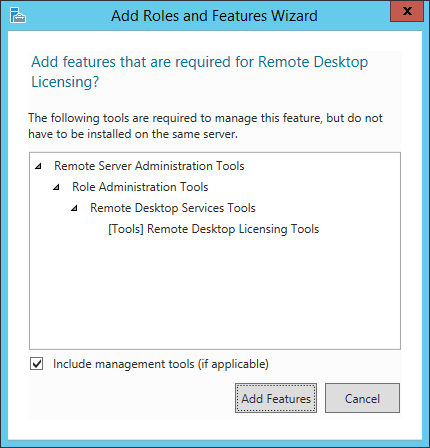
But these are mostly for analyzing licensing and configurering the license server itself. It’s also possible to do this using powershell:
Install-WindowsFeature –Name RDS-Licensing
Install-WindowsFeature –Name RDS-RD-Server -Restart
Great, now lets configure the service using Server manager:
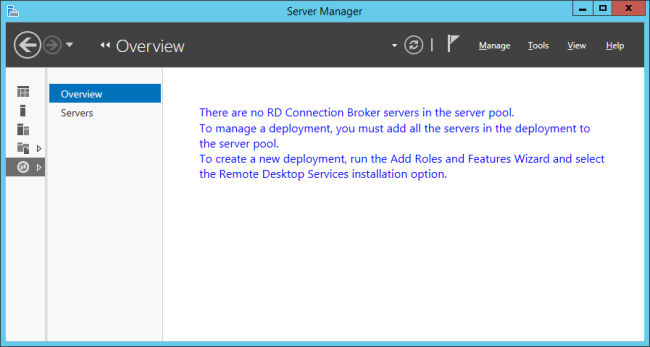
Ok, no go here, which makes sense since the way 2012 and up works completely different than 2008(R2).
Or does it? The truth is, it isn’t. Under the hood, much of the settings are the same as in 2008R2. They’ve removed the management consoles we know from 2008, and added a more centralized server management. More on this in another blog.
Ok, so how to configure this bare bone config? Powershell?

Won’t work, they have rewritten the cmdlets to only use the new way. In 2008R2 you could manage the settings of a RDSH farm through the use of group policies, and this is still possible in 2012R2:

The license mode is easily configured:
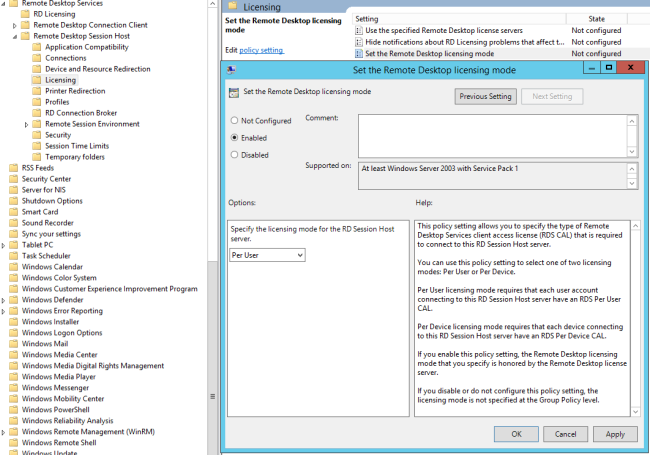
Almost everything can be configured here, the RDP certificate is one of those things you cannot do using Group policy. I guess in that in most of these small deployments, having a self generated certificate is acceptable. But not all, so we’ll configure this too. You could of course do it using templates from you’re own CA, but I wanna use another certificate. And besides, having a CA doesn’t really count as a small deployment 😉 .
The powershell cmdlets all need a Connection broker, but as always, there is another way.
The certificate (with private key) has to be imported into the personal store of the local machine.
Now we need the Thumbprint of the certificate:
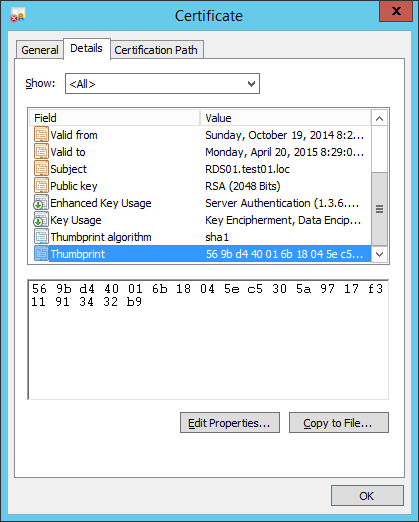
And after removing all spaces, we can use it in the following powershell script:
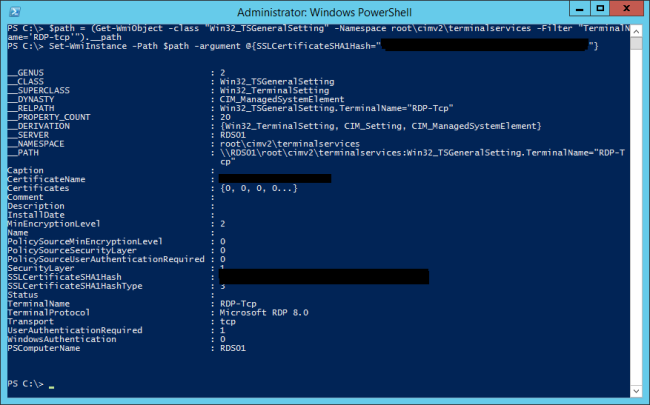
$path = (Get-WmiObject -class “Win32_TSGeneralSetting” -Namespace root\cimv2\terminalservices -Filter “TerminalName=’RDP-tcp'”).__path
Set-WmiInstance -Path $path -argument @{SSLCertificateSHA1Hash=”ThumbprintWithoutSpaces”}
Which binds the desired certificate to the RDP protocol:
Done, a simple setup. While I know this isn’t a configuration which will be useful in most cases. It’s just that it can be in some. And I like it to be able to keep it simple 🙂
